Author Archives: GCSDev

ROSE… QUEEN OF THE GARDEN

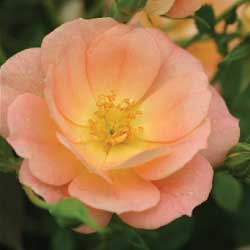
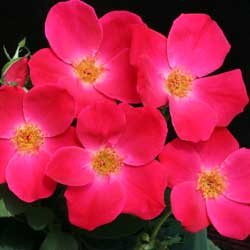
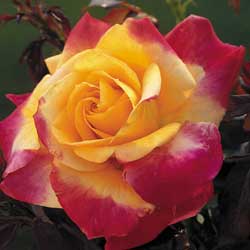
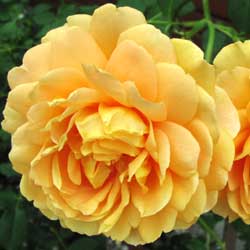
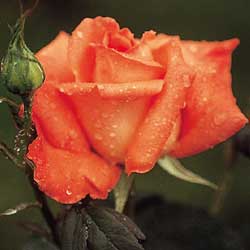
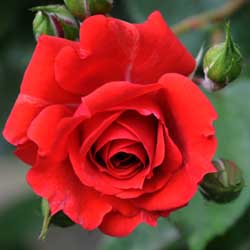
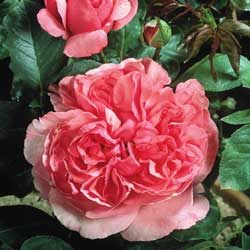
We all love roses. It may be the fragrance, color or the flower form that attracts us. It may be the memories that roses evoke. Whatever the reason, roses are one of the world’s most popular flowers. With so many different types of roses available, ranging from the diminutive miniatures to the towering climbers, there is no excuse to exclude this “Queen of Flowers” from your garden.

ROSE TYPES

Hybrid Tea Roses are a favorite of rose gardeners that enjoy long stemmed, large flowers.  Hybrid tea flowers have many petals and plants grow upright and tall, about 3 – 7 feet. These roses are appropriate in either a formal garden or informal planting.

Floribunda Roses have smaller flowers than hybrid teas with the flowers arranged in clusters. This rose bush is useful as a hedge and in mass plantings.

Grandiflora Roses were developed by crossing hybrid teas with floribundas. This rose grows to around 10 feet tall so it should be used in the back of the border. The flowers of the Grandiflora are hybrid tea form and can be single stemmed or borne in clusters depending on the cultivar.

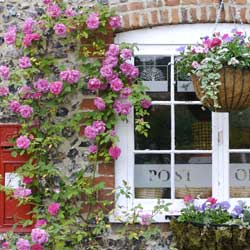
Climbing Roses make an outstanding vertical display when trained on arbors, walls, fences, trellises and pergolas and can grow from 8 – 15 feet tall. Flowers may be borne large and single or small and arranged in clusters.

Miniature Roses are dwarf in every way – flowers, leaves and height. This rose may be mass planted as a ground cover, used as border or grown in containers on decks, patios and porches.

Shrub Roses are renowned for their bushy habit and excellent disease resistance making them and excellent choice for mass planting. The shrub rose flower may be either single or double. Some types have very showy rose hips.

Old Roses are making a come-back! Although bloom times and color choices are limited, old roses are much more fragrant, vigorous and disease resistant than modern roses. To obtain all the qualities of an old rose combined with a long bloom time of a modern rose, look for the David Austin varieties.

THE BASICS OF ROSE CARE

Beginners often become confused with the many recommendations and suggestions for growing roses.  However, it is important to start with the basic guidelines for successful rose growing.  Roses can thrive under many conditions, but they sure grow better when you follow the basics.

Prepare the Soil

  1. Take a soil sample to test the pH.  Roses like a pH of 6.0 to 6.8.  You may need to add lime to raise the pH or sulfur to lower it.
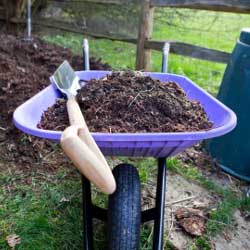
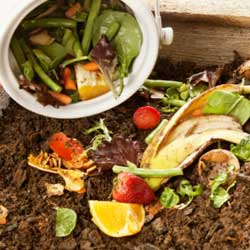
  2. Incorporate composted cow manure or compost into the soil.

Planting

  1. Select a sunny spot with good soil drainage – roses require at least 6 hours of full sun daily.  Early morning sun is preferred, because it dries the leaves, which helps prevent disease.
  2. Dig a wide, shallow hole that is 2 to 3 times as wide, but not quite as deep as the root ball (about 1 inch shallower).  The plant should sit on solid ground so it doesn’t sink when the soil settles.
  3. Remove the plant from the pot and loosen any circling roots.  If you can’t pull the roots apart, use a knife to make 4 to 5 vertical cuts in the root ball.  This will allow new roots to grow out into the surrounding soil.
  4. Place the plant in the hole slightly elevated above ground level.  Backfill with soil until the hole is half full.
  5. Soak the root ball with a mixture of a Root Stimulator & Transplanting Solution.
  6. Fill the rest of the hole with soil and water thoroughly.  Apply mulch to a depth of 2”, being careful not to mound mulch against the trunk of the plant.

Prune

  1. In spring, remove winter mulch when new grow appears.  Prune out all dead wood and twiggy growth and cut back to sound wood with a clean slanting cut, just above a good bud eye.
  2. During the growing season, remove fading roses promptly, cutting just above a five-leaflet leaf.
  3. To winterize, remove all fallen leaves and debris from the base of the plant, cut back to 10-12 inches after the ground freezes, then apply a mound of mulch over the canes.

Feed and Water

  1. Roses thrive best when given 1 inch of water weekly.  A thorough soaking from rain or hose will keep roses blooming all season.  Try not to overhead water unless it is early in the day, as the damp leaves can promote disease.
  2. Fertilize monthly with Espoma Rose-tone.

Treat for Disease and Pests

  1. Fungus disease cannot be cured, so a regular spraying schedule is very important.  Keep an eye on plants that were infected last year and spray with a fungicide to prevent outbreaks this year.
  2. You will also need to use an insecticide for any insect problems.
  3. Many find it convenient to use an all-purpose insect and disease spray once a week or a systemic control every 6 weeks.
roses_3

roses_4

roses_5

roses_7

roses_8

roses_9

roses_1

roses_2

PERENNIAL POWER

When choosing a perennial to fill an empty space in your garden, make sure to get the most bang from your buck by selecting one, or several, of the long blooming perennials listed below.

Achillea (Yarrow)
Alcea (Hollyhock)
Anemone (Wind Flower)
Asclepias tuberosa (Butterfly Weed)
Campanula (clips series)
Clematis ‘Jackmani’
Coreopsis (Tickseed)
Corydalis lutea (Yellow Bleeding Heart)
Delosperma (Ice Plant)
Dicentra exima (Bleeding Heart)
Doronicum
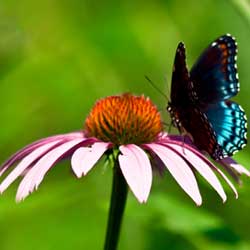
Echinacea (Coneflower)
Gallardia (Blanket Flower)
Gaura (Wand Flower)
Geranium ‘Johnson Blue’
Helenium (Helen’s Flower)
Heliopsis (Sunflower)
Hemerocallis ‘Stella D’Oro’ (Daylily)
Hemerocallis ‘Happy Returns’ (Daylily)
Kniphofia (Red Hot Poker)
Lavender
Liatris spicata (Gayfeather)
Ligularia (Ragwort)
Lobelia cardinalis (Cardinal Flower)
Lythrum (Loosestrife)
Malva (Mallow)
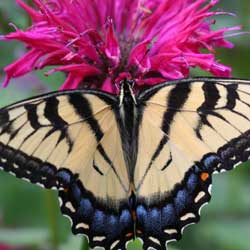
Monarda (Bee Balm)
Nepeta (Catnip or Catmint)
Oneothra ‘Siskiyou’ (Evening Primrose)
Perovskia (Russian Sage)
Rudbeckia (Coneflower)
Salvia (most verticillata)
Scabiosa (Pincushion Flower)
Shasta Daisy ‘Becky’ or ‘Snow Queen’
Stokesia (Stoke’s Aster)
Veronica (Speedwell)
peren_2

peren_3

CAUTION IN THE GARDEN… CHLOROSIS

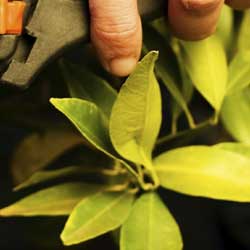
Yellow means caution, even in the garden. While leaf yellowing, chlorosis, may be a signal that there is a problem that requires attention, it may also be normal.  Chlorosis is the scientific word used to indicate the full or partial yellowing of plant leaves or stems and simply means that chlorophyll is breaking down.

Normal Chlorosis – Yellowing leaves at the base of an otherwise healthy plant is normal; the plant is simply utilizing the nitrogen and magnesium for exposed leaves near its top rather than older, lower leaves.

Chlorotic Response to Light – Moving a plant from full sun to shade, or visa-versa, can cause yellowing leaves.  Make sure that you grow and maintain your plant in the proper light.

Chlorotic Response to Moisture – Sudden changes in soil moisture may damage or kill plant roots. Most otherwise healthy plants, however, are able to grow new roots as they readjust.  Maintain correct soil moisture or move the plants to a more favorable environment.

Mineral Deficiency – A shortage of some key mineral nutrients will cause chlorosis in plants. Often, a yellow leaf indicates a lack of nitrogen, however, magnesium, iron, sulfur or manganese deficiencies are indicated by yellowing leaves with prominent green leaf veination. A magnesium deficiency will manifest itself in the yellowing of older leaves. On the other hand, an iron deficiency presents itself in the yellowing of new or young leaves. A simple soil analysis will let you know what minerals or trace elements your soil is deficient in.

Soil Factors – Although the essential and trace elements may be present in the soil, many other factors affect how the plant uses and absorbs them.  If the soil pH is too high/low or there is too much salt in the soil, the plant will not be able to utilize the available nutrients. Test your soil pH and adjust as necessary.

Toxins – Although this doesn’t happen frequently, pollutants like paint, oil, chemical solvents, airborne herbicides or pesticides or other pollutants may cause leaves to turn yellow and dark brown before dying.  In this case, remove and dispose of the plant and its surrounding soil.

bug_1

HEAVENLY HOSTA

Heavenly Hostas, their real glory is in their foliage.  The thin spikes of purple or white, trumpet shaped flowers appear for several weeks in the summer and are an added benefit to this divine perennial.

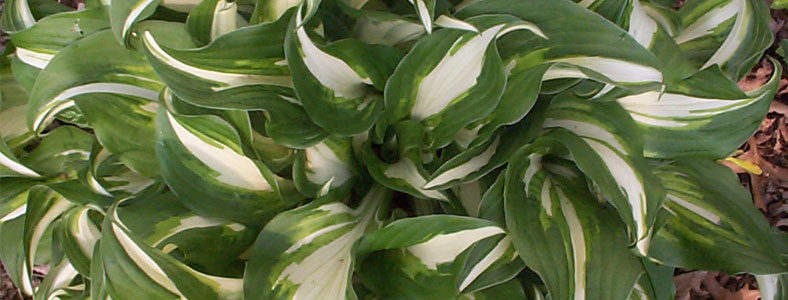
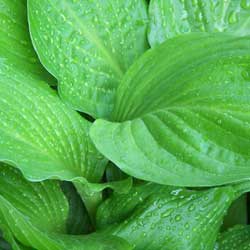
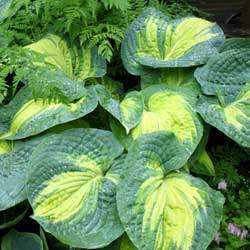
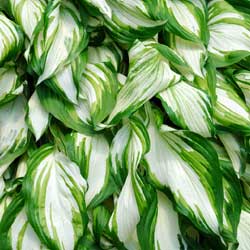
Hostas are praised by many for their magnificent variety of leaf size, color and texture. These angels will grace your garden with heart-shaped, lance-shaped, oval and nearly round leaves. Smooth, quilted or puckered textures, with either a matte or glossy sheen add to the glory or the Hostas radiant glow.

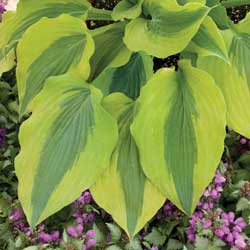
The leaf margins can be either smooth or wavy and range in color from light to dark green. Colors also include chartreuse, gray and blue. Variegated varieties of cream, white or yellow will radiate in a dark area of your garden.

While most hostas are shade worshippers, some types will tolerate sun. Hostas remain attractive from spring until frost and can withstand a wide range of growing conditions.

As choice groundcovers or single specimens in the landscape, hostas are certainly divine. Some hostas are quite unusual and rare and may increase in value each year.

Little maintenance is required to care for hostas. Cut off old flower stalks after flowers have faded. Divide plants occasionally to increase their quantity. With so many selections and varieties, you can find a hosta the will fit into almost any garden situation. Stop by and check out our heavenly selection today!

Uses For Hostas

Dwarf & Small Hosta: In addition to being planted in secret little pockets throughout your garden or next to paths, dwarf and small hostas can be used in difficult places. Plant them among tree roots, on a slope or in rocky places containing little soil.

Edger Hosta: These hostas are 12” or less in height and have more horizontal growth. They are able to control weeds as they leave not light, when well established, or room for them to grow.

Groundcover Hosta: This group of hostas grow in height to 18” or less.  They do a great job in areas difficult to weed or maintain.  If you are in need of a hosta for use as a groundcover, keep in mind it works great to plant spring flowering bulbs among them. The hosta comes up after the show of flowers and covers the fading foliage of the bulbs.

Background Hosta: Selections from this group grow to 24” or taller at maturity. They can be used to increase privacy where you sit and relax or to provide definition to your property line.

Specimen Hosta: Specimens may be any size. Choose a site close to where the plant will be viewed so that every detail (like texture, color patter, buds, flowers and fragrance) may be enjoyed.

hosta_1

hosta_2

hosta_3

hosta_4

DWARF EVERGREEN CONIFERS

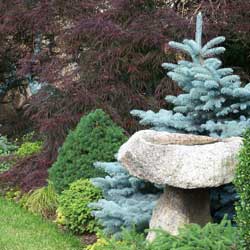
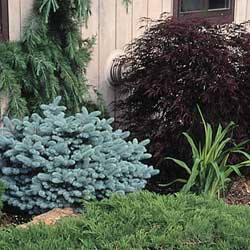
Dwarf conifers are some of the most versatile and popular plants of today’s modern garden and landscape.  These fantastic plants add interesting texture, color and form to rock, pond and container gardens as well as a mixed border.  Dwarf conifers are virtually carefree and often provide four seasons of interest.

We commonly think of conifers as needled evergreens such as pines, spruce and firs; However, not all conifers are needled and not all are evergreen.  The common Larch is needled, but deciduous.  Ginko trees are conifers that have fan-shaped deciduous leaves, and this tree is neither needled nor evergreen.  What identifies a plant as a conifer is that it is cone-bearing.  Dwarf conifers are slower growing and smaller versions of the straight species of a given conifer.  A good example is our Eastern White Pine, Pinus strobus, which can reach a height of one hundred feet at maturity.  The dwarf version of this plant, Pinus strobus ‘Nana’, will only grow to eighteen feet at maturity.

Due to their popularity, new varieties of dwarf conifers are being introduced each season.  This gives you an almost endless selection…We would like to share some of our favorites:

Abies alba ‘Green Spiral’ (Silver Fir)
Abies lagrocarpa ‘Arizona Glauca Compacta’ (Rocky Mountain Fir)
Abies procera ‘Sherwoodi’ (Noble Fir)
Abies balsomea ‘Nana’ (Dwarf Balsam Fir)
Cedrus deodora ‘Albospica’ (Deodar Cedar)
Chamaecyparis obtusa ‘Nana’ (Dwarf Hinoki Falsecypress)
Chamaecyparis obtuse ‘Nana Lutea’ (Hinoki Falsecypress)
Chamaecyparis pisifera ‘Aurea Nana’ (Japanese Falsecypress)
Picea abies ‘Little Gem’ (Norway Spruce)
Picea abies ‘Conica’ (Norway Spruce)
Picea abies ‘Pumila’ (Norway Spruce)
Picea abies ‘Argenteospicata’ (Norway Spruce)
Picea pungens ‘Montgomery’ (Colorado Spruce)
Picea pungens ‘Fat Albert’ (Colorado Spruce)
Pinus cembra ‘Glauca Nana’ (Swiss Stone Pine)
Pinus mugo (Mugo Pine)
Pinus nigra ‘Hornibrookiana’ (Autstrian Pine)
Pinus sylvestris ‘Globosa Viridis’ (Scotch Pine)
Tsuga canadensis ‘Gentsch White’ (Canadian Hemlock)

dwarf_2

dwarf_3

dwarf_1

MORE THAN JUST MULCH

Not only does mulch add a decorative finish to your flower beds, it also helps keep soil cool and moist and thus reduces the need for watering. By using a pre-emergent herbicide with mulch, weed seeds can be discouraged from germinating and growing. And, I’m sure we can all agree, weeding is a chore nobody likes to do!  So, which mulch should you use?
Pine Bark and Chips – Pine mulches should be used around plant that require and acidic soil such as azalea, rhododendron, mountain laurel and holly.
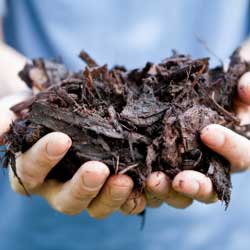
Shredded hardwood – This is by far the most popular mulch. It has a dark color and knits together well so that it does not wash away.
Shredded Cedar – This long-lasting hard wood mulch has a pleasant fragrance. Cedar mulch also knits together well and is thought to repel insects.

MULCH FACTS:

  • 1 cubic yard of mulch will cover 150 square feet of area to a depth of 2 inches. We recommend 2 inches as the dept for optimum plant vigor and growth.
  • There are 27 cubic feet in 1 cubic yard.
  • Compost is an excellent soil amendment but should not be used as a top dressing.
  • When applied correctly, mulches reduce the growth of weed, prevent soil moisture evaporation, maintain consistent soil temperatures, improve soil structure and increase soil nutrients as they decay and keep the garden looking neat and tidy.

mulch_1

mulch_2

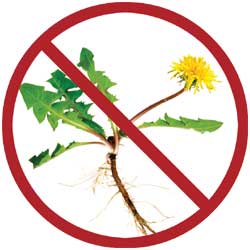
WEEDS ARE INDICATORS OF SOIL PROBLEMS

Plants voluntarily grow in locations that they are well suited to.  Forests develop in fertile soil and overtime the plants growing in the forest change.  This is because the plants are adding and subtracting from the soil and making the conditions different, changing the group of plants that can be successful within that environment.  A location that was once suited for an Aspen or a Larch will someday be home to an Oak because of these changes.  Scientists can often tell the condition of a forest by the plants that are thriving.  The same is true with a lawn.

We can tell the health of a soil below a lawn by the weeds that are successful in the competition for space.  Weeds are defined by most as “plants out of place”.  They are advantageous plants growing in locations that they are well suited for.  Weeds in a lawn are a problem because they are not as effective as grass in achieving the outcomes that are desired from maintaining a lawn.  Safety, erosion control, water purification, water infiltration, atmospheric carbon reduction and other environmental benefits that are the result of lawn grasses are reduced by most weeds.

The best defense against weeds is a healthy lawn, because grass can easily out-compete weeds when conditions are maintained in the grasses favor.  Nutrient deficiencies, nutrient excesses, soil compaction, acidic soils, excessive shade, wet soils and many other problems can be detected by what plants are successful in infiltrating a lawn.  Below is a list of some of the common names of indicator weeds (scientific name in parenthesis) that can help determine what issues are making your lawn less than perfect.  Correct the problem that creates a competitive advantage for the weed and you will have an easier time getting the lawn results you are looking for.

Weeds Associated with Different Soil Problems

Acid soil: sorrel (Rumex species), sow thistle (Sonchus species), prostrate knotweed (Polygonum aviculare), lady’s-thumb (Polygonum persicaria), wild strawberries (Fragaria species), plantain (Plantago major), rough cinquefoil (Potentilla monspeliensis), silvery cinquefoil (Potentilla argentea), hawkweeds (Hieracium aurantiacum and pratense), knapweeds (Centaurea species), bentgrasses (Agrostis species)

Alkaline soil: field peppergrass (Lepidium virginicum), goosefoot (Chenopodium species), gromwell (Lithospermum officinale), true chamomile (Anthemis nobilis), bladder campion (Silene latifolia)

Wet or poorly drained soil: horsetail (Equisetum arvense), sedges (Carex species), lady’s-thumb (Polygonum persicaria), joe-pye weed (Eupatorium purpureum), silvery cinquefoil (Potentilla argentea), curly dock (Rumex crispus), mosses, Pennsylvania smartweed (Polygonum pensylvanicum), tall buttercup (Ranunculus acris), creeping buttercup (Ranunculus repens), sheep sorrel (Rumex acetosella), Canada goldenrod (Solidago canadensis), lance-leaved goldenrod (Solidago graminifolia), meadow pink (Lychnis floscuculi), jewelweed (Impatiens pallida), coltsfoot (Tussilago farfara), sweet flag (Acorus calamus), ground nut (Apios americana), annual bluegrass (Poa annua), common chickweed (Stellaria media), crabgrass (Digitaria species), goosegrass (Elusine species), ground ivy (Glechoma hederacea), mouse-ear chickweed (Cerastium vulgatum), violets (Viola species), yellow nutsedge (Cyperus esculentus) 

Dry soil: Virginia pepperweed (Lepidium virginicum), rough cinquefoil (Potentilla monspeliensis), potato vine (Ipomoea pandurata), yarrow (Achillea millefolium), black medic (Medicago lupulina), red sorrel (Rumex acetosella)

Compacted or heavy soil: wild garlic (Allium vineale), dandelion (Taraxacum officinale), broadleaf dock (Rumex obtusifolius), creeping buttercup (Ranunculus repens), plantain (Plantago major), annual bluegrass (Poa annua), common chickweed (Stellaria media), goosegrass (Elusine indica), knotweed (Polygonum aviculare), mouse-ear chickweed (Cerastium vulgatum), prostrate spurge (Euphorbia supina)

Soil with a hardpan or hard crust: horse nettle (Solanum carolinense), pennycress (Thiaspi arvense), quack grass (Agropyron repens), field mustard (Brassica nigra), morning-glory (Ipomoea purpurea), pineapple weed (Matricaria sauveolens)

Previously cultivated soil: Lamb’s-quarters (Chenopodium album), plantain (several species), ragweed (Ambrosia artemisiifolia), purslane (Portulaca oleracea), dandelion (Taraxacum officinale), chickweed (Stellaria media), pigweeds (family Amaranth), carpetweed (Mollugo verticillata)

High fertility soil: chicory (Cichorium intybus), pigweeds (family Amaranth), purslane (Portulaca oleracea), dandelion (Taraxacum officinale), lamb’s-quarters (Chenopodium album), burdock (Arctium minus), pokeweed (Phytolacca americana), butter print (Abutilon theophrasti), Queen Anne’s lace (Daucus carota), annual bluegrass (Poa annua), bentgrasses (Agrostis species), Henbit (Lamium amplexicaule), yellow woodsorrel (Oxalis stricta), crabgrass (Digitaria species), mallow (Malva neglecta), purslane (Portulaca oleracea)

Low fertility soil: plantains (Plantago species), red sorrel (Rumex acetosella), white clover (Trifolium repens)

Shaded soil: annual Bluegrass (Poa annua), common chickweed (Stellaria media), ground ivy (Glechoma hederacea), mouse-ear chickweed (Cerastium vulgatum), nimblewill (Muhlenbergia shreberi), violets (Viola species)

This article was provided by and may be found, along with other helpful turf information, at www.TheLawnInstitute.org.

weed_1

weed_2

HEALTHY SOIL… HEALTHY PLANTS

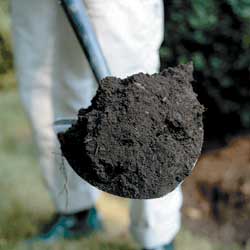
The key to successful gardening is “healthy soil.”  This basic principle of organic gardening applies to all plants.  Quite simply, when you feed the soil the proper nutrients, you let the soil feed the plants.  So how do you “feed” the soil?  First, you need to understand some elementary information about your soil and why it is so important, and then you can take steps to improve it.

To start, you should determine the soil texture by moistening the soil and rubbing it between your thumb and fingers to determine it’s “feel.”  Sands are gritty and will barely hold together; clay can be squeezed into a firm shape; and silt will act in a way to allow particles to cling together.  Sandy soils tend to dry out quickly because they contain high amounts of soil air.  Oppositely, clay soils have a tendency to pack together, shutting out air and water.  The best garden soil, “loam,” has moderate amounts of sand, silt and clay.  Generally, soil in our area tends to be clayey.  This condition can be improved by adding a soil conditioner like Gypsum. For sandy soils, humus should be added to help retain moisture and nutrients.

Next, you must evaluate the soil structure.  Soil structure is affected by soil pH, the amount of humus and the combination of minerals in the soil.  Ideal soils allow soil particles to clump together with air spaces between them for water drainage as well as oxygen consumption and carbon dioxide release from plant roots.  The best way to improve soil structure is to add high amounts of organic matter like humus, dehydrated manure, composted manure, mushroom compost, alfalfa meal, peat moss, or worm castings.

You will also need to take a soil sample, to measure the pH and amounts of nitrogen, phosphorus and potassium in the soil as well as other nutrients. This will help determine exactly what the soil needs.  Our staff will help you read the results and determine what to add to your soil and how much.  Generally, a pH of 6.0 to 7.0 is acceptable.  If your pH is lower than this, your soil is too acidic and requires lime to be added.  If your soil is low in organic matter, it will often have a high pH level. All plants require a proper balance of nutrients – nitrogen (N), phosphorus (P) and potassium (K).  Soils lacking any one of these elements will not produce healthy plants.  Refer to the Organic Fertilizer Chart for suggested amendments.

When dealing with poor or improperly balanced soils, obtaining “healthy” soil may take two to five years to acquire.  The best thing you can do to supplement your soil program is to use various organic fertilizers to meet your plants’ needs and regularly add organic matter.  This will continue to help the soil structure as well as create biological activity that is also a vital part to developing productive soil.

Key Words

Soil Texture – The proportional amount of sand, silt and clay in the soil.

Soil Structure – The arrangement of soil particles in the soil.

Soil pH – The measurement of acidity or alkalinity of the soil.

Organic Matter – Various forms of living and dead plant and animal matter.

healthy_1

healthy_2

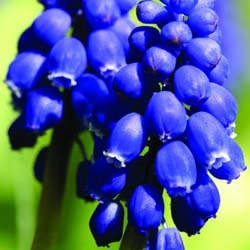
Nurturing Spring Bulbs

Spring bulbs faithfully reappear at the most advantageous time – after a long, cold winter. Most spring bulbs are perennial and multiply in number every year. Seemingly carefree, bulbs do require a bit of nurturing to ensure that they perform their very best for years to come.

  1. Good soil drainage is important to prevent bulbs from rotting. Plan your site accordingly.
  2. When planting bulbs in the fall, add a high phosphorus fertilizer to the planting hole for the development strong roots. Bone meal is an excellent choice.
  3. Bulb foliage will often break through the soil after a few warm winter days. This vegetation is hardy and its exposure to the cold will not damage your plants or prevent them from blooming.
  4. Fertilize bulbs as plants are emerging from the ground. Do not fertilize them once flowers appear. Use a complete fertilizer that is high in phosphorus, like a granular 5-10-5, to assist in foliage and flower development.
  5. After blooming, cut back the flower stalk leaving the bulb foliage. This will force the plant to put its energy into the bulb for next year’s flowers and not into seed production.
  6. Allow the leaves to die back naturally. The leaves are vital for producing food that is stored in the bulb for next year’s growth. Cut bulb leaves, never pull them, once they have turned yellow. Do not tie leaves as this reduces the leaf surface required for adequate food production.
  7. When the foliage dies back the bulb is dormant, this is the proper time to dig and separate bulbs if necessary. Flowering will often be reduced when bulb beds become over-crowded. If division is needed, bulbs should be dug and stored in a well-ventilated place and replanted in the fall.
  8. Fertilize bulbs again in the fall with a high-phosphorus, granular fertilizer.
SONY DSCbulbs_5


Early Spring Gardener’s Calendar

* Plan your summer vegetable and herb garden. We offer a wide selection of seeds that include all of your favorite annuals, perennials, vegetables and other novelties as well as many hard-to-find selections. Inventory your pots and flats and discard unusable ones. Make a list of the supplies you will need. Have your garden soil tested for nutrient content. We offer a variety of do-it-yourself soil test kits.

* Prune woody plants while dormant, including fruit trees, summer- and fall-blooming shrubs and vines. Limit pruning of spring-blooming trees and shrubs to the removal of sucker growth and rubbing or broken branches. Spray trees and shrubs with year-round horticultural oil to reduce insect population.

* Sharpen, clean and oil tools and lawn mowers. Begin heavy annual pruning of shrub roses as new leaves appear.

* Plant pansies, English daisies and primrose as soon as the earth is workable. Plant strawberry plants. Sow cool-season vegetables and herbs in the garden.

* Start spring cleanup and begin major lawn work. Remove debris, dethatch your lawn or aerate compacted areas to improve water penetration.

* Spray needles and limbs of Arborvitae, Cryptomeria, false cypress, fir, hemlock, Juniper, pine, yew and spruce (except blue spruce) for spider mites with year-round horticultural oil.

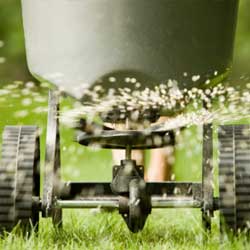
*Apply crabgrass preventer with fertilizer to feed the lawn and control crabgrass. Do not use on newly seeded lawns.

* Continue spring cleanup. Cultivate to remove winter weeds and debris from the planting beds. Apply corn gluten or a pre-emergent herbicide with fertilizer specified for gardens and scratch it in to prevent future weeds. Do not use in gardens where you will be direct seeding.

* Reseed bare spots in established lawns. Keep the area moist until seedlings appear, then mow when the new grass is 3? high.

* Prune forsythia and other spring-flowering trees & shrubs after the flowers fall.

* Dig and divide crowded early spring bulbs after they finish blooming. Enrich the soil with bone meal.

* Plant and transplant trees and shrubs, including roses, ground covers, and perennials.

* Transplant cool-season seedlings into the garden. When the soil temperature reaches 60 degrees, sow warm-season vegetable and herb seeds.

* Place gro-thru sets over peonies, grasses or any other perennials in need of support.

cal2cal3

cal4

cal1